Adding a dormer can completely transform your home’s look, increase interior space, and improve natural lighting. If you’ve ever asked yourself, “How To Make A Shed Roof Dormer On My House?” you’re not alone. Many homeowners dream of enhancing their living space by incorporating a shed roof dormer.
This type of dormer features a single, sloping roof that extends out from the main roof, making it simpler and more cost-effective than other dormer styles. Beyond its functionality, it can add architectural charm and raise your home’s curb appeal.
In this guide, we’ll cover everything from planning to final touches, so you can confidently approach building a shed roof dormer for your house.
Read too: Is It Reasonable to Ask the Seller to Replace the Roof?
What Is a Shed Roof Dormer?
A shed roof dormer is a window structure projecting vertically from a sloping roof, topped with a roof that slopes in the same direction as the main roof but at a shallower angle. It’s popular because it:
- Creates more usable floor space in attics or upper levels.
- Allows more natural light into dark areas.
- Adds value and character to your home.
Benefits of Building a Shed Roof Dormer
Before diving into the “how,” it’s important to understand why homeowners often choose this type of dormer:
- Simplicity – Easier to design and build compared to gable dormers.
- Cost-Effective – Requires fewer materials and less labor.
- Maximizes Space – Provides the most interior headroom.
- Energy Efficiency – Offers room for larger windows, increasing natural light.
- Curb Appeal – Enhances exterior design with modern yet classic appeal.
How To Make A Shed Roof Dormer On My House
If you’re ready to take on the project, here’s a structured approach to how to make a shed roof dormer on my house safely and effectively.
Step 1: Planning and Design
Before you start cutting into your roof, proper planning is essential.
- Check Local Codes: Building permits are usually required for structural modifications. Contact your local building authority first.
- Assess Roof Structure: Determine whether your roof can support the additional load of a dormer.
- Design the Dormer: Sketch dimensions, window placement, and slope. Software or professional architectural drawings can help.
- Budgeting: Include costs for lumber, roofing materials, insulation, windows, and labor if you hire contractors.
Step 2: Gather Tools and Materials
You’ll need a mix of standard carpentry tools and roofing supplies:
- Circular saw, hammer, drill, measuring tape, level
- Lumber for framing (2x4s, 2x6s, plywood sheathing)
- Roofing shingles or metal sheets (to match your main roof)
- Flashing and waterproofing materials
- Insulation, drywall, and finishing supplies
- Safety equipment (harness, ladder, gloves, goggles)
Step 3: Preparing the Roof
- Mark the dormer’s location on your roof.
- Use chalk lines to outline the opening.
- Remove shingles in the marked area carefully.
- Cut the roof decking within your outline to create the dormer opening.
Tip: Cover the exposed area with a tarp if you’re working over multiple days to protect against rain.
Step 4: Building the Dormer Frame
- Construct Side Walls: Use 2x4s to frame vertical walls on each side of the dormer opening.
- Front Wall Framing: Build the front wall with an opening for your window.
- Attach to Rafters: Secure framing to existing rafters to ensure stability.
- Add Plywood Sheathing: Nail sheathing to the exterior of the walls.
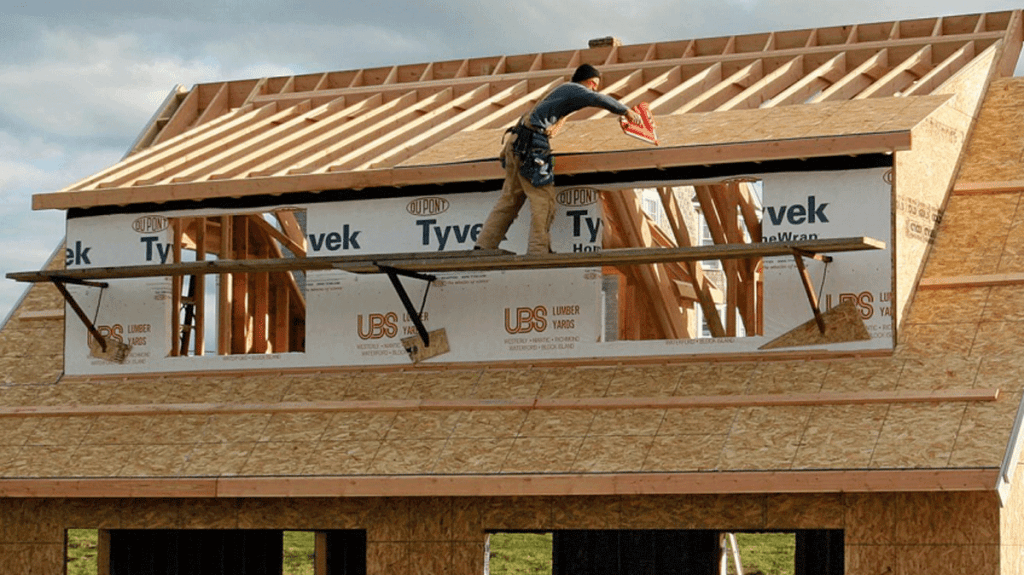
Step 5: Roof Framing
The roof of your shed dormer should slope downward at a shallower angle than the main roof.
- Install horizontal headers between rafters to support the dormer roof.
- Frame rafters for the dormer roof, sloping down from the main roof connection.
- Add plywood or OSB sheathing on top of the dormer rafters.
Step 6: Roofing and Waterproofing
- Install underlayment to protect from leaks.
- Place shingles or roofing material to match your home’s roof.
- Use flashing where the dormer meets the main roof to prevent water infiltration.
- Double-check all seals, especially around windows.
Step 7: Installing Windows
- Insert your pre-selected dormer window into the framed opening.
- Secure with screws or nails according to manufacturer instructions.
- Seal edges with flashing tape and caulk to ensure waterproofing.
Step 8: Interior Work
Inside your home, finish the dormer so it blends seamlessly with your space:
- Insulate walls and roof framing.
- Install drywall, mud, tape, and sand for a smooth finish.
- Paint or wallpaper as desired.
- Trim around windows for a polished look.
Mistakes to Avoid When Building a Shed Roof Dormer
- Skipping Permits: This can result in fines or forced removal of the dormer.
- Poor Waterproofing: Improper flashing leads to costly leaks.
- Underestimating Structural Load: Weak framing risks collapse.
- Inconsistent Roof Slope: Misalignment creates aesthetic and drainage problems.
- DIY Beyond Your Skill Level: Some tasks may be better left to professionals.
Costs of Adding a Shed Roof Dormer
- DIY Costs: $2,000–$6,000 depending on materials and size.
- Professional Installation: $10,000–$20,000 for design, labor, and materials.
The investment can significantly raise your home’s value, making it a worthwhile project.
Alternatives to a Shed Roof Dormer
If you’re unsure about building a shed dormer, consider these options:
- Gable Dormer: Adds triangular roof and classic charm.
- Eyebrow Dormer: Offers a unique curved roofline.
- Skylight: Easier installation with similar light benefits.
Maintaining Your Shed Roof Dormer
Once built, proper care will ensure your dormer lasts for decades:
- Inspect flashing and shingles annually for damage.
- Clean gutters near the dormer to prevent leaks.
- Repaint and seal interior trim as needed.
- Monitor for drafts and re-caulk around windows.
Conclusion
Asking “How To Make A Shed Roof Dormer On My House?” leads to one of the most rewarding home improvement projects you can undertake. Not only does it expand living space and natural light, but it also enhances your home’s architectural style.
By following careful planning, proper construction techniques, and regular maintenance, you can enjoy the beauty and practicality of your new dormer for years to come. Whether you tackle it yourself or hire professionals, this addition will undoubtedly add charm and value to your home.


Leave a Reply