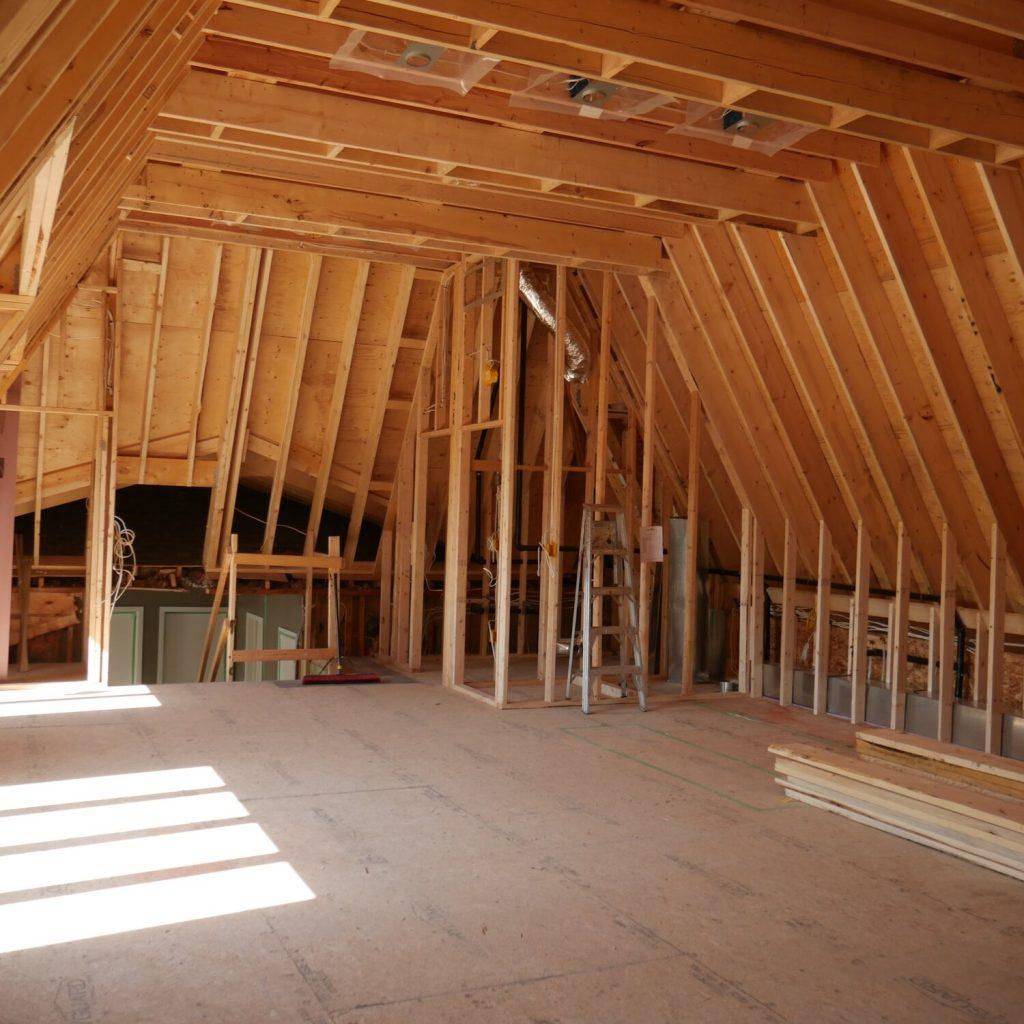
The distinctive and elegant Mansard roof design has been a favorite among homeowners and architects for centuries. With its steep lower slope and a flat or gently sloping upper slope, the Mansard roof offers not only a unique aesthetic but also additional living or storage space. However, the framing of a Mansard roof is more complex than that of a conventional gable roof. In this article, we will delve into the art of framing a Mansard roof, explaining the process step by step to help you understand and appreciate this architectural gem.

Understanding the Mansard Roof Design
What Makes a Mansard Roof Unique?
A Mansard roof, also known as a French roof, is characterized by its distinct double-sloped design. The lower slope is steep, while the upper slope is flatter. This design not only enhances the visual appeal of a building but also provides additional room for living or storage in the attic space. Framing such a roof requires careful planning and execution.
The Anatomy of a Mansard Roof
Before we dive into the framing process, let’s examine the key components of a Mansard roof:
- Lower Slope: The lower slope is the steeper section of the roof that extends from the eaves to a point near the top. This section is typically where the primary living or storage space is located.
- Upper Slope: The upper slope is the flatter section of the roof that tops the lower slope. It provides structural support for the roof and adds to the roof’s overall style.
- Eaves: The eaves are the edges of the roof that overhang the walls. In a Mansard roof, these overhangs are typically minimal.
- Dormer Windows: Dormer windows are often incorporated into the design of a Mansard roof, providing light and ventilation to the attic space.
Framing a Mansard Roof: Step by Step
Framing a Mansard roof requires a meticulous approach to ensure structural integrity and aesthetics. Here’s a step-by-step guide:
1. Determine the Pitch:
- Calculating the Roof Pitch
- Before you begin framing, calculate the pitch of the lower and upper slopes. The lower slope is typically steeper than the upper slope, with the exact angles depending on your design and local building codes.
2. Layout and Framing:
- Framing the Lower Slope
- Start with the framing of the lower slope. Use lumber or engineered wood products to create the structure, including the rafters, joists, and sheathing. Dormer windows, if included, should also be framed.
- Subheading: Framing the Upper Slope
- Move on to the upper slope, framing it according to your design and the roof’s dimensions. The upper slope often includes dormer windows as well.
3. Sheathing and Roofing:
- Sheathing the Mansard Roof
- Apply sheathing to both the lower and upper slopes to provide structural support and a base for roofing materials.
- Roofing Materials
- Choose roofing materials that suit your design and climate. Asphalt shingles, metal roofing, or other options can be used to cover the Mansard roof.
4. Flashing and Finishing:
- Flashing and Waterproofing
- Properly flash and waterproof the roof to prevent leaks and water damage.
- Finishing Touches
- Add the finishing touches to complete the Mansard roof’s aesthetic. This may include decorative elements, trim, and gutter systems.
Conclusion
Framing a Mansard roof is a complex but rewarding endeavor. When executed properly, it results in a visually striking and functional roof that adds character and space to a building. Whether you’re considering a Mansard roof for a new construction project or renovating an existing structure, understanding the framing process is essential to ensure a successful outcome. With careful planning and the right materials, you can enjoy the beauty and functionality of this timeless architectural feature.


Leave a Reply