With the increasing emphasis on renewable energy, more homeowners are opting to install solar panels on their roofs. Understanding how solar panels are installed on roof can help you make an informed decision and prepare for the installation process. This comprehensive guide will walk you through the steps involved in installing solar panels, the necessary preparations, and the benefits of this sustainable energy solution.
Why Install Solar Panels?
Before diving into the installation process, it’s important to understand why solar panels are a worthwhile investment. Solar panels offer numerous benefits, including:
- Energy Savings: Solar panels can significantly reduce or even eliminate your electricity bills.
- Environmental Impact: By using renewable energy, you reduce your carbon footprint and contribute to a cleaner environment.
- Increased Property Value: Homes with solar panels are often appraised higher and sell faster than those without.
- Energy Independence: Solar panels provide a degree of energy independence, reducing reliance on grid electricity.
Preparation for Solar Panel Installation
Before the actual installation, several preparatory steps are necessary to ensure a smooth and successful project. These steps include evaluating your energy needs, assessing your roof’s suitability, obtaining necessary permits, and selecting a qualified installer.
1. Evaluating Your Energy Needs
Understanding your household’s energy consumption is crucial. Review your electricity bills to determine your average monthly usage. This information helps in sizing the solar panel system correctly.
Read too: Decoding Timelines: How Long Does It Take To Replace A Roof and What to Expect
2. Assessing Your Roof’s Suitability
Not all roofs are suitable for solar panels. Factors to consider include:
- Orientation and Tilt: Ideally, your roof should face south and have a tilt between 15 to 40 degrees.
- Shading: Ensure there are no obstructions like trees or buildings that cast shadows on your roof.
- Condition: Your roof should be in good condition and capable of supporting the additional weight of the panels.
3. Obtaining Permits and Inspections
Solar panel installation requires various permits and inspections to comply with local regulations. These typically include:
- Building Permits: Issued by local authorities, these permits ensure the installation meets safety and structural standards.
- Electrical Permits: Ensure the electrical work is up to code.
- Utility Approvals: Necessary for connecting the solar system to the grid.
4. Selecting a Qualified Installer
Choose a reputable installer with experience in residential solar panel installations. Check their certifications, reviews, and warranties offered.
How Solar Panels Are Installed On Roof: Step-by-Step Process
Now that you’re prepared, let’s explore the step-by-step process of how solar panels are installed on roof.
1. Site Assessment and Design
The first step involves a detailed site assessment by the installer. This includes:
- Roof Inspection: Evaluating the roof’s structure, condition, and measuring dimensions.
- Shading Analysis: Using tools to assess the impact of shading on solar panel performance.
- System Design: Based on the assessment, the installer designs a custom solar panel system, specifying the number and placement of panels, inverters, and other components.
2. Acquiring Permits and Approvals
Once the design is finalized, the installer will acquire the necessary permits and approvals from local authorities and the utility company. This process can take several weeks, depending on local regulations.
3. Ordering Equipment
After obtaining permits, the installer orders the necessary equipment, including solar panels, inverters, racking systems, and wiring. The equipment is delivered to the site, ready for installation.
4. Mounting the Racking System
The racking system serves as the foundation for the solar panels. The steps involved include:
- Marking the Roof: The installer marks the locations for mounting brackets based on the system design.
- Installing Flashing: Flashing is installed under the roof shingles to prevent water leakage.
- Attaching Mounting Brackets: The brackets are securely attached to the roof rafters.
- Installing Rails: Rails are attached to the brackets, forming the framework to which the solar panels will be mounted.
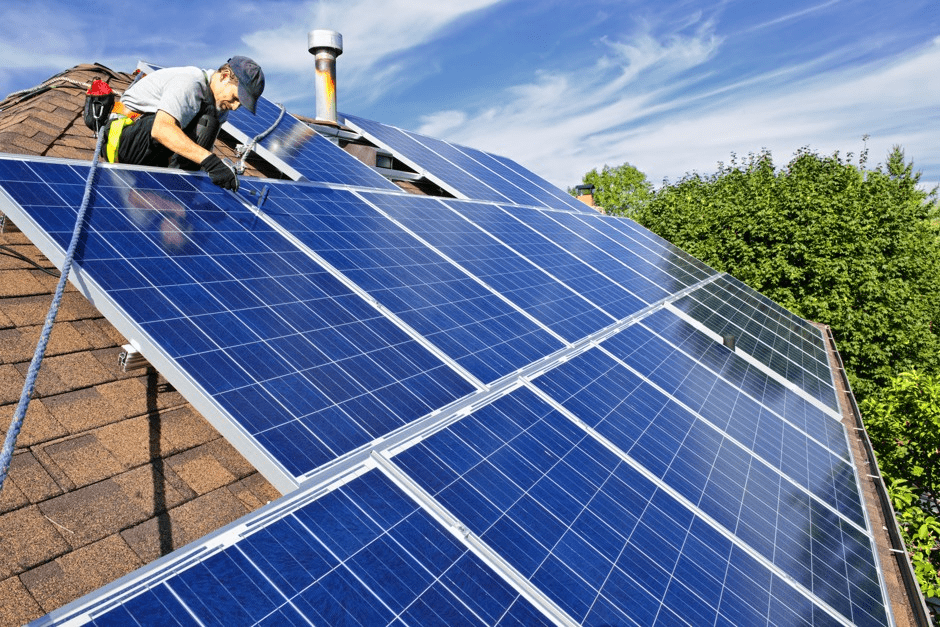
5. Installing Solar Panels
With the racking system in place, the solar panels are ready to be mounted. This involves:
- Positioning the Panels: Panels are carefully positioned on the rails according to the design layout.
- Securing the Panels: The panels are secured to the rails using clamps and bolts, ensuring they are firmly in place.
6. Wiring the System
Electrical wiring is a critical step in the installation process. It includes:
- Connecting Panels: Solar panels are connected in series or parallel to form an array.
- Installing the Inverter: The inverter, which converts DC electricity generated by the panels into AC electricity for home use, is installed.
- Running Conduit: Electrical conduit is used to run wires from the panels to the inverter and from the inverter to the electrical panel.
7. Connecting to the Grid
After wiring, the system is connected to the home’s electrical panel and the grid. This step involves:
- Installing a Meter: A bi-directional meter is installed to measure the electricity generated by the solar panels and the electricity consumed from the grid.
- Utility Inspection: The utility company conducts an inspection to ensure the system meets all regulatory requirements.
- System Activation: Once approved, the system is activated, and you start generating solar power.
Post-Installation Considerations
After installation, there are a few additional steps to ensure the system operates efficiently and safely.
1. System Monitoring
Many solar panel systems come with monitoring software that allows you to track energy production and usage. Regular monitoring helps detect and address any issues promptly.
2. Maintenance
Solar panels require minimal maintenance. However, it’s important to:
- Clean Panels: Keep the panels clean from dust, leaves, and debris to ensure maximum efficiency.
- Inspect Regularly: Periodically inspect the system for any signs of damage or wear.
3. Insurance and Warranties
Update your homeowner’s insurance policy to include the solar panel system. Additionally, review the warranties provided by the installer and equipment manufacturers for coverage details.
Benefits of Solar Panel Installation
Installing solar panels offers numerous benefits, including:
- Cost Savings: Reduced electricity bills and potential income from excess energy sold back to the grid.
- Environmental Impact: Lower carbon footprint and reduced reliance on fossil fuels.
- Increased Home Value: Homes with solar panels often have higher property values and attract eco-conscious buyers.
- Energy Independence: Reduced dependence on the grid, especially during peak usage times or outages.
Conclusion
Understanding how solar panels are installed on roof is crucial for homeowners considering this renewable energy solution. From evaluating your energy needs and assessing your roof’s suitability to the step-by-step installation process and post-installation considerations, this guide provides a comprehensive overview. By investing in solar panels, you not only contribute to a sustainable future but also enjoy significant cost savings and energy independence.


Leave a Reply