Installing a clay tile roof is a significant investment that adds durability and aesthetic value to your home. Clay tiles are renowned for their longevity, fire resistance, and ability to withstand harsh weather conditions. This comprehensive guide will walk you through the steps on how to install a clay tile roof, ensuring a successful and long-lasting installation.
Understanding the Basics of Clay Tile Roofs
Before diving into the installation process, it’s essential to understand the basics of clay tile roofs and why they are a popular choice among homeowners.
Benefits of Clay Tile Roofs
- Durability: Clay tiles can last 50 to 100 years or more with proper maintenance.
- Weather Resistance: They can withstand extreme weather conditions, including high winds, heavy rain, and hail.
- Energy Efficiency: Clay tiles provide natural insulation, helping to keep your home cooler in the summer and warmer in the winter.
- Aesthetic Appeal: Available in various colors and styles, clay tiles enhance the visual appeal of any home.
- Low Maintenance: Clay tiles require minimal maintenance compared to other roofing materials.
Types of Clay Tiles
Clay tiles come in several shapes and styles, including:
- Flat Tiles: Offer a simple and clean look.
- Pantiles: Have a distinctive S-shape that creates a ripple effect.
- Mission or Barrel Tiles: Feature a semi-cylindrical shape and are typically used in Mediterranean-style architecture.
Read too: How To Replace Roof Shingles That Blew Off: A Comprehensive Guide
Preparation: Getting Ready for Installation
Assess Your Roof Structure
Before installing a clay tile roof, it’s crucial to ensure that your roof structure can support the weight of the clay tiles. Clay tiles are significantly heavier than asphalt shingles or metal roofing. Consult a structural engineer if you have any doubts about your roof’s capacity.
Gather Necessary Materials and Tools
For a successful installation, you’ll need the following materials and tools:
- Clay tiles
- Underlayment (preferably a high-quality, waterproof material)
- Roofing nails or screws
- Flashing
- Ridge and hip tiles
- Chalk line
- Measuring tape
- Hammer or nail gun
- Safety gear (gloves, goggles, harness)
Remove Old Roofing Material
If you are replacing an existing roof, remove all old roofing materials, including shingles, nails, and underlayment. Clean the roof deck thoroughly to ensure a smooth and stable surface for the new underlayment.
How To Install Clay Tile Roof: Step-by-Step Guide
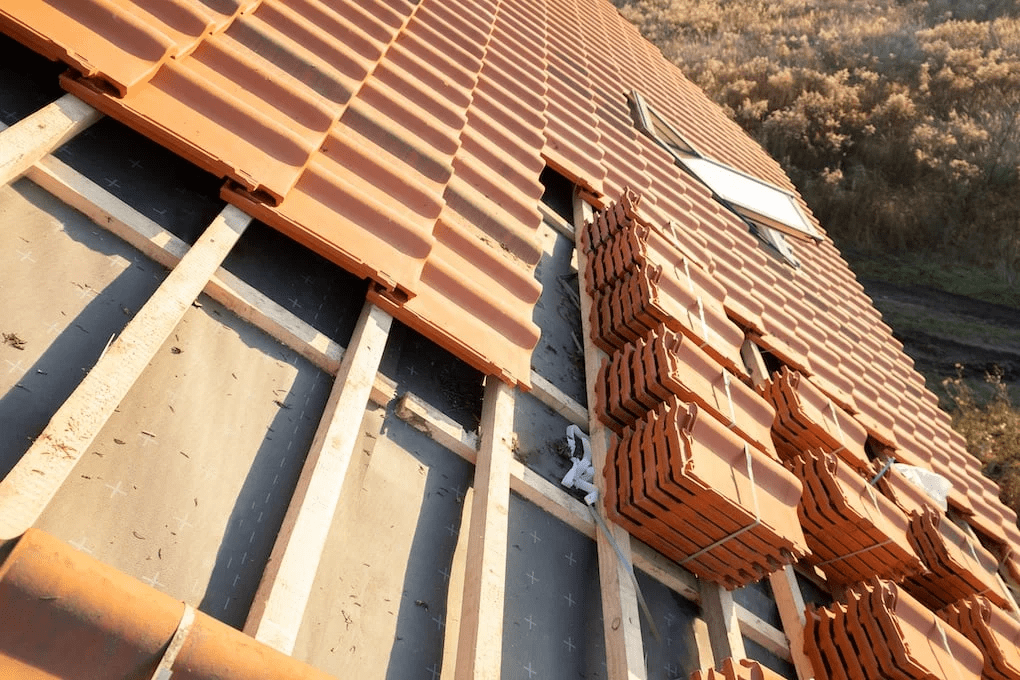
Step 1: Install the Underlayment
Start by laying down the underlayment, which acts as a waterproof barrier to protect the roof deck. Roll out the underlayment horizontally across the roof, starting at the eaves and working your way up to the ridge. Overlap each row by about 6 inches to ensure full coverage. Secure the underlayment with roofing nails or staples, spaced about 12 inches apart.
Step 2: Install Flashing
Install metal flashing around roof penetrations such as chimneys, vents, and skylights. Flashing helps prevent water from seeping into these vulnerable areas. Ensure the flashing extends under the underlayment for optimal waterproofing.
Step 3: Layout the Tile Pattern
Using a chalk line, mark vertical and horizontal lines on the underlayment to guide the placement of the tiles. This ensures a straight and even installation. Typically, you’ll start at the bottom edge of the roof and work your way up.
Step 4: Install the First Course of Tiles
Begin at the bottom edge of the roof, also known as the eaves. Place the first row of tiles, aligning them with the chalk lines. Secure each tile with a roofing nail or screw, making sure not to over-tighten and crack the tile. Use two fasteners per tile, one on each side.
Step 5: Install Subsequent Courses
Continue installing tiles row by row, working your way up the roof. Overlap each tile with the one below it to ensure proper water runoff. Use spacers if necessary to maintain consistent gaps between the tiles, allowing for thermal expansion.
Step 6: Install Ridge and Hip Tiles
Once you reach the top of the roof, install the ridge and hip tiles. These tiles cover the peaks and edges of the roof, providing a finished look and additional protection against water infiltration. Secure them with nails or screws, ensuring they are properly aligned and sealed.
Step 7: Inspect and Adjust
After installing all the tiles, inspect the roof for any loose or misaligned tiles. Make any necessary adjustments to ensure a secure and aesthetically pleasing finish. Check the flashing and underlayment for any gaps or issues that need attention.
Tips for a Successful Installation
- Safety First: Always use appropriate safety gear and follow safety protocols when working on a roof.
- Work in Sections: Divide the roof into manageable sections to ensure a more organized and efficient installation process.
- Check Local Building Codes: Ensure that your installation meets local building codes and regulations.
- Weather Considerations: Avoid installing clay tiles in extreme weather conditions, as this can affect the adhesive and the integrity of the installation.
Maintenance and Care for Clay Tile Roofs
Regular Inspections
Conduct regular inspections of your clay tile roof, especially after severe weather events. Look for cracked or broken tiles, loose fasteners, and any signs of water damage.
Cleaning
Keep your roof clean by removing debris such as leaves and branches. Avoid using high-pressure washers, as they can damage the tiles. Instead, use a soft brush or low-pressure hose to clean the roof.
Repairs
Promptly replace any broken or damaged tiles to prevent water infiltration and further damage to the roof structure. For minor repairs, you can use roofing cement to seal cracks and gaps.
Conclusion
Installing a clay tile roof is a substantial project that requires careful planning and execution. By following this comprehensive guide on how to install a clay tile roof, you can ensure a durable, weather-resistant, and visually appealing roof that will enhance your home’s value and longevity. Always prioritize safety and consult professionals when necessary to achieve the best results.


Leave a Reply