When it comes to maintaining the integrity of your home, the roof is one of the most critical components. A broken roof tile can lead to leaks, water damage, and even structural issues if not addressed promptly. This article will guide you through the process of how to replace a broken roof tile, ensuring your home remains protected from the elements.
Understanding Roof Tiles and Their Importance
What Are Roof Tiles?
Roof tiles are designed to protect your home from weather conditions, including rain, wind, and sun. They come in various materials such as clay, concrete, and slate, each offering unique benefits in terms of durability, insulation, and aesthetic appeal.
The Importance of Roof Tile Maintenance
Maintaining roof tiles is crucial for several reasons:
- Preventing Leaks: Broken tiles can allow water to penetrate the roof, leading to leaks and water damage inside your home.
- Protecting Structural Integrity: Water infiltration can cause wood rot and weaken the structural components of your roof.
- Energy Efficiency: Damaged tiles can affect the insulation properties of your roof, leading to higher energy bills.
- Aesthetic Appeal: Keeping your roof in good condition maintains the overall appearance of your home.
How To Replace A Broken Roof Tile
Tools and Materials Needed
Before starting the replacement process, gather the following tools and materials:
- Replacement roof tiles (matching the existing ones)
- Ladder
- Pry bar
- Hammer
- Chisel
- Roofing adhesive or mortar
- Safety gloves and goggles
Safety Precautions
Safety should be your top priority when working on a roof. Here are some safety tips to follow:
- Use a sturdy ladder: Ensure the ladder is stable and placed on a flat surface.
- Wear safety gear: Gloves and goggles protect your hands and eyes from debris.
- Avoid working in adverse weather: Wet or windy conditions can make the roof slippery and dangerous.
- Have a spotter: If possible, have someone assist you by holding the ladder and providing tools.
Step-by-Step Guide: How To Replace A Broken Roof Tile
1: Inspect the Damage
Begin by inspecting the roof to locate the broken tile. Assess the extent of the damage and determine if any adjacent tiles are also affected.
2: Remove the Broken Tile
- Lift the Surrounding Tiles: Using a pry bar, carefully lift the tiles surrounding the broken one. Be gentle to avoid breaking any additional tiles.
- Remove the Broken Tile: Once the surrounding tiles are lifted, use the pry bar to lift the broken tile. If it is stubborn, use a hammer and chisel to carefully break the tile into smaller pieces for easier removal.
3: Prepare the Area
- Clean the Area: Remove any debris or remnants of the old tile from the area. Ensure the surface is clean and smooth for the new tile to adhere properly.
- Check the Underlayment: Inspect the roofing underlayment for any damage. If it is torn or worn, replace it to ensure proper protection against moisture.
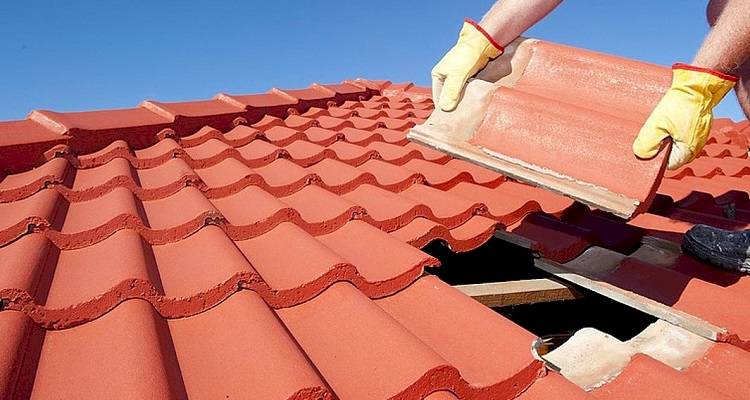
4: Install the New Tile
- Apply Adhesive: Apply roofing adhesive or mortar to the back of the new tile. This will help secure it in place.
- Place the New Tile: Carefully slide the new tile into position, ensuring it aligns with the surrounding tiles. Press down firmly to ensure it adheres properly.
- Secure the Surrounding Tiles: Lower the surrounding tiles back into place, making sure they sit flat and secure.
5: Inspect the Installation
- Check for Alignment: Ensure the new tile is aligned with the existing roof tiles. It should sit flush with no gaps.
- Inspect for Stability: Gently press on the new tile to ensure it is securely attached. If it moves, add more adhesive and press down again.
Maintenance Tips for Roof Tiles
Regular Inspections
Perform regular roof inspections, especially after severe weather conditions. Look for signs of damage, such as cracked or missing tiles, and address any issues promptly.
Cleaning the Roof
Keep your roof clean by removing debris such as leaves and branches. This helps prevent moss and algae growth, which can damage the tiles and underlayment.
Addressing Minor Repairs
For minor cracks or chips, use roofing sealant to prevent further damage. This can extend the life of the tile and avoid the need for a full replacement.
When to Call a Professional
While replacing a single roof tile is a manageable DIY project, some situations require professional assistance:
- Extensive Damage: If multiple tiles are broken or there is significant damage to the underlayment, it’s best to call a professional roofer.
- Steep Roofs: Working on steep roofs can be dangerous without the proper equipment and experience.
- Complex Roof Designs: If your roof has a complex design or multiple levels, professional expertise ensures the job is done correctly.
Read too: Decoding Timelines: How Long Does It Take To Replace A Roof and What to Expect
Conclusion
Knowing how to replace a broken roof tile is an essential skill for homeowners. By following the steps outlined in this guide, you can address minor roof tile damage promptly, preventing more significant issues and maintaining the integrity of your roof. Regular maintenance and inspections are key to extending the life of your roof tiles and ensuring your home remains protected from the elements.


Leave a Reply