Install Satellite Dish On Roof. Installing a satellite dish on your roof can be an excellent way to ensure you get the best signal and most reliable service for your television and internet needs. However, proper installation is crucial to avoid signal issues and potential damage to your property. This guide will walk you through the process of installing a satellite dish on your roof, including preparation, installation steps, and maintenance tips.
Why Install a Satellite Dish On Your Roof?
Before diving into the installation process, it’s important to understand why mounting a satellite dish on your roof might be the best choice for you.
Optimal Signal Reception
A roof-mounted satellite dish typically offers the best signal reception. By placing the dish higher up, you minimize obstructions such as trees, buildings, and other structures that can interfere with the satellite signal. This higher position helps ensure that you receive a clear and uninterrupted signal, which is crucial for high-quality television and internet services.
Aesthetic Considerations
Mounting the satellite dish on your roof can be more aesthetically pleasing compared to placing it on a pole or the ground. A properly installed dish will blend in with the roofline and have minimal visual impact on your home’s exterior.
Read too: How To Replace Roof Shingles That Blew Off: A Comprehensive Guide
Space Efficiency
Installing the dish on the roof frees up space around your property. This can be particularly beneficial if you have limited space in your yard or garden, or if you want to keep the dish out of reach of children or pets.
Preparing for the Installation
Before you begin the installation process, several preparatory steps are essential to ensure a smooth and successful setup.
Check Local Regulations
Before installing a satellite dish, check with your local authorities or homeowner’s association (HOA) regarding any regulations or restrictions. Some areas have specific rules about the placement and size of satellite dishes, and it’s important to ensure compliance to avoid any legal issues.
Choose the Right Equipment
Selecting the right equipment is crucial for a successful installation. Make sure you have the following:
- Satellite Dish Kit: This typically includes the dish, mounting bracket, LNB (Low Noise Block converter), and necessary cables.
- Mounting Hardware: Roof mounts or brackets that are compatible with your type of roof.
- Tools: You’ll need tools such as a drill, screwdriver, wrench, and possibly a ladder or scaffolding.
Inspect the Roof
Before installation, inspect your roof to ensure it’s in good condition. Look for any signs of damage or wear that might affect the installation. Make sure the area where you plan to install the dish is accessible and has a clear line of sight to the satellite.
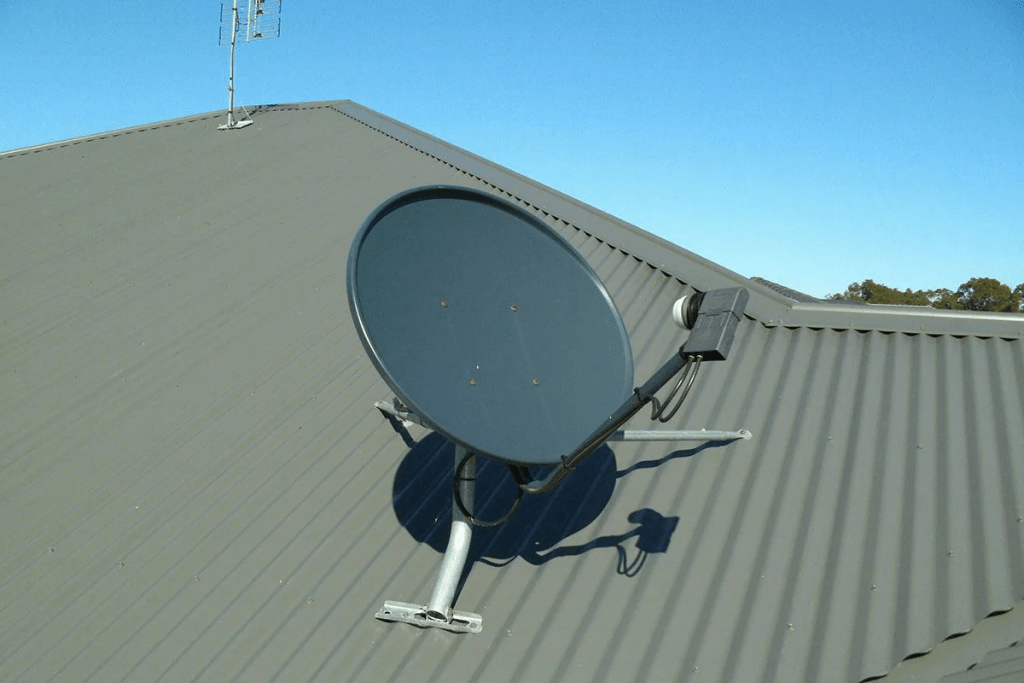
How to Install Satellite Dish On Roof
Follow these steps to install your satellite dish on the roof:
1. Determine the Best Location
The first step in installing your satellite dish is to choose the best location on your roof. Look for a spot with an unobstructed view of the sky, ideally facing the direction of the satellite. Use a satellite finder or alignment tool to help determine the optimal angle and position.
2. Attach the Mounting Bracket
Once you’ve selected the location, it’s time to attach the mounting bracket to the roof. Here’s how:
- Mark the Drilling Points: Use a pencil to mark the points where you’ll drill holes for the mounting bracket. Ensure these points align with the rafters or structural beams to provide a secure attachment.
- Drill the Holes: Drill holes into the marked points, making sure they are the correct size for the mounting bolts.
- Secure the Bracket: Attach the mounting bracket to the roof using the provided bolts and washers. Make sure the bracket is level and securely fastened.
3. Assemble the Satellite Dish
Next, assemble the satellite dish according to the manufacturer’s instructions. This typically involves attaching the dish to the arm or bracket and installing the LNB.
4. Mount the Dish
With the mounting bracket securely in place, attach the satellite dish to the bracket. Ensure that the dish is properly aligned and tightened to prevent any movement.
5. Connect the Cables
Connect the cables from the dish to your satellite receiver. Make sure the cables are securely connected and routed to avoid any damage or interference.
6. Adjust the Dish Alignment
Use a satellite finder or signal meter to fine-tune the alignment of the dish. Adjust the dish’s angle and position until you receive the strongest signal. This may involve making small adjustments and checking the signal strength multiple times.
7. Secure Everything
Once you’re satisfied with the signal strength, make sure all components are securely fastened. Check the mounting bracket, dish, and cables to ensure they are all properly installed and won’t be affected by weather conditions.
8. Test the Signal
Finally, test the signal on your satellite receiver to ensure everything is working correctly. Check all channels and services to confirm that the installation was successful.
Maintenance and Troubleshooting
Proper maintenance and troubleshooting can help keep your satellite dish in optimal condition.
Regular Inspections
- Check for Debris: Regularly inspect the dish for any debris, such as leaves or snow, that may obstruct the signal.
- Inspect for Damage: Look for signs of wear or damage to the dish, mounting bracket, and cables. Address any issues promptly to avoid signal problems.
Signal Issues
- Signal Loss: If you experience signal loss or poor quality, check the alignment and connections. Realign the dish if necessary and ensure all cables are securely connected.
- Weather Effects: Inclement weather can affect signal quality. If you notice issues during adverse weather conditions, wait until the weather improves and check the signal again.
Conclusion
Installing a satellite dish on your roof can significantly enhance your television and internet experience by providing better signal reception and a more aesthetically pleasing setup. By following the steps outlined in this guide, you can ensure a successful installation that maximizes performance and minimizes potential issues.
Remember to prepare adequately, choose the right equipment, and perform regular maintenance to keep your satellite dish functioning optimally. With the right approach, you can enjoy clear and uninterrupted service for years to come.


Leave a Reply