When it comes to improving your home’s energy efficiency and comfort, installing rigid foam insulation on the roof is a highly effective strategy. This type of insulation provides excellent thermal resistance, helping to keep your home warm in the winter and cool in the summer. In this comprehensive guide, we’ll walk you through everything you need to know about installing rigid foam insulation on your roof, including the benefits, installation process, and tips for success.
What is Rigid Foam Insulation?
Rigid foam insulation is a type of insulation material that comes in rigid panels. It is known for its high insulating value and moisture resistance. Commonly made from materials like polystyrene (XPS or EPS) or polyisocyanurate (polyiso), rigid foam insulation is used in various applications, including walls, floors, and roofs.
Read too: How To Replace A Mobile Home Roof: Step-by-Step Guide for Homeowners
Benefits of Rigid Foam Insulation
- High Thermal Resistance: Rigid foam insulation provides superior thermal resistance (R-value), which helps to reduce heat transfer and improve energy efficiency.
- Moisture Resistance: Unlike some other insulation materials, rigid foam is highly resistant to moisture, making it ideal for use in areas prone to dampness.
- Durability: Rigid foam panels are durable and can withstand physical stress, making them a long-lasting insulation solution.
- Ease of Installation: The panels are relatively easy to handle and cut, which simplifies the installation process.
Why Install Rigid Foam Insulation On Your Roof?
Installing rigid foam insulation on your roof can provide several benefits:
1. Improved Energy Efficiency
By reducing heat loss and gain, rigid foam insulation helps to maintain a consistent indoor temperature. This can lead to lower heating and cooling costs, making your home more energy-efficient.
2. Enhanced Comfort
Proper insulation helps to create a more comfortable living environment by minimizing drafts and temperature fluctuations. This is particularly important in regions with extreme weather conditions.
3. Reduced Condensation
Rigid foam insulation helps to control condensation by creating a continuous thermal barrier. This can prevent moisture-related issues, such as mold and mildew growth.
4. Increased Roof Longevity
Adding insulation to your roof can help protect the roofing materials from extreme temperatures, potentially extending the lifespan of your roof.
How to Install Rigid Foam Insulation On Roof: A Step-by-Step Guide
Installing rigid foam insulation on your roof involves several key steps. Here’s a detailed guide to help you through the process:
1: Gather Your Materials and Tools
Before starting, make sure you have the necessary materials and tools:
- Rigid Foam Panels: Choose the appropriate type and thickness based on your insulation needs and local building codes.
- Adhesive or Fasteners: Depending on the installation method, you’ll need adhesive or fasteners to secure the insulation panels.
- Utility Knife: For cutting the foam panels to size.
- Measuring Tape: To ensure accurate measurements.
- Ruler or Straightedge: For cutting straight lines.
- Safety Gear: Gloves, goggles, and a dust mask for protection.
2: Prepare the Roof Surface
- Clean the Surface: Remove any debris, old roofing materials, or loose insulation from the roof surface. The surface should be clean and dry to ensure proper adhesion.
- Inspect for Damage: Check for any signs of damage or leaks in the roof. Make necessary repairs before proceeding with the insulation installation.
3: Measure and Cut the Insulation Panels
- Measure the Roof Area: Use a measuring tape to determine the dimensions of the roof where the insulation panels will be installed.
- Cut the Panels: Using a utility knife, cut the rigid foam panels to fit the measured dimensions. Ensure that the cuts are straight and precise for a snug fit.
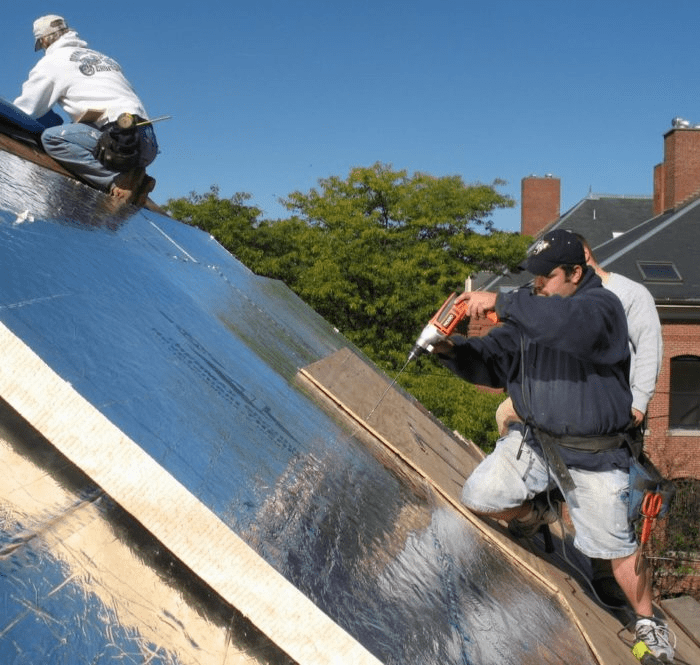
4: Install the Insulation Panels
- Apply Adhesive or Fasteners: Depending on your chosen method, apply adhesive to the back of the insulation panels or use fasteners to secure them to the roof surface. Follow the manufacturer’s recommendations for adhesive application or fastener spacing.
- Position the Panels: Place the cut insulation panels onto the roof surface, ensuring they fit tightly together. Stagger the seams between panels to avoid creating continuous gaps.
- Press and Secure: Press the panels firmly into place to ensure a good bond with the adhesive or to ensure that the fasteners are securely holding the panels.
5: Seal and Finish
- Seal Joints and Seams: Apply a sealant or foam tape to seal the joints and seams between the insulation panels. This helps to create a continuous thermal barrier and prevent air leaks.
- Inspect the Installation: Check the installation for any gaps or areas where the insulation may not be properly secured. Make any necessary adjustments or repairs.
6: Proceed with Roofing Installation
Once the insulation is installed and sealed, you can proceed with the installation of roofing materials. Follow the manufacturer’s guidelines for installing roofing materials over rigid foam insulation.
Tips for Successful Installation
- Follow Manufacturer Instructions: Always refer to the manufacturer’s guidelines for the specific rigid foam insulation you are using. This includes recommendations for installation methods, adhesives, and sealants.
- Consider Building Codes: Ensure that your installation complies with local building codes and regulations. This may include specific requirements for insulation thickness, ventilation, and fire resistance.
- Work in Suitable Conditions: Install insulation when weather conditions are favorable. Avoid installing insulation during rainy or extremely cold weather, as this can affect adhesion and performance.
- Check for Air Leaks: After installation, check for any air leaks or gaps in the insulation. Proper sealing is essential for maximizing the energy efficiency of your insulation.
Common Mistakes to Avoid
When installing rigid foam insulation on your roof, be aware of these common mistakes and how to avoid them:
- Improper Cutting: Ensure that the insulation panels are cut accurately to fit the roof surface. Poorly cut panels can create gaps and reduce the effectiveness of the insulation.
- Inadequate Sealing: Failing to seal joints and seams properly can lead to air leaks and reduced insulation performance. Use high-quality sealants and follow installation guidelines.
- Neglecting Roof Preparation: Properly prepare the roof surface before installation to ensure a good bond and avoid issues with insulation performance.
Conclusion
Installing rigid foam insulation on your roof is a highly effective way to enhance your home’s energy efficiency, comfort, and durability. By following the steps outlined in this guide and avoiding common mistakes, you can achieve a successful insulation installation that provides long-lasting benefits. Whether you’re upgrading your current insulation or undertaking a new roofing project, rigid foam insulation offers a reliable solution for improving your home’s performance and comfort.


Leave a Reply