Shingling valleys on a roof is a critical aspect of roofing that requires precision and care. Valleys are the areas where two roof planes meet, forming a “V” shape that channels water off the roof. Properly shingling these valleys is essential to prevent leaks and ensure the longevity of your roofing system. In this comprehensive guide, we will explore the best practices and techniques for shingling valleys on a roof, providing you with the knowledge needed to achieve a professional and durable finish.
Understanding Roof Valleys
Before diving into the specifics of shingling, it’s important to understand what a roof valley is and why it’s a crucial part of your roofing system.
Read too: Is It Reasonable to Ask the Seller to Replace the Roof?
1. Definition of a Roof Valley
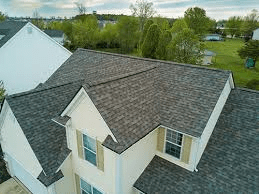
A roof valley is formed where two sloped roof sections meet, creating a trough-like area that directs rainwater and snow towards the gutters. Valleys are prone to collecting debris and water, making them susceptible to leaks if not properly shingled.
2. Types of Roof Valleys
There are primarily two types of roof valleys:
- Open Valleys: These have a metal flashing installed in the valley area, which is visible and helps direct water flow.
- Closed Valleys: These are shingled directly, without visible metal flashing, and rely on the shingles and underlayment to prevent leaks.
Why Proper Shingling of Valleys is Crucial
Properly shingling valleys is essential for several reasons:
- Preventing Leaks: Valleys are high-risk areas for leaks because they handle a significant amount of water runoff. Proper shingling ensures that water is directed away from the roof deck and into the gutters.
- Extending Roof Lifespan: Incorrectly shingled valleys can lead to premature wear and tear, reducing the overall lifespan of your roof.
- Maintaining Aesthetic Appeal: Proper installation of shingles in the valleys contributes to the overall appearance of your roof, providing a clean and professional look.
Shingling Valleys on a Roof: Step-by-Step Instructions
Shingling valleys requires attention to detail and adherence to specific techniques to ensure a watertight seal. Follow these step-by-step instructions for effective shingling of valleys on a roof:
1. Preparation
1.1. Inspect the Roof: Before beginning, inspect the valley area for any damage or issues. Ensure that the valley is clean and free from debris.
1.2. Gather Tools and Materials: You will need the following tools and materials:
- Roofing shingles
- Roofing nails or staples
- Roofing underlayment
- Valley flashing (for open valleys)
- Utility knife
- Measuring tape
- Chalk line
- Hammer or nail gun
1.3. Install Underlayment: Apply roofing underlayment in the valley area to provide an extra layer of protection against water infiltration. Overlap the underlayment by at least 6 inches on each side of the valley.
2. Shingling Open Valleys
2.1. Install Valley Flashing: For open valleys, install metal valley flashing according to the manufacturer’s instructions. Ensure that the flashing extends up the roof planes on both sides of the valley.
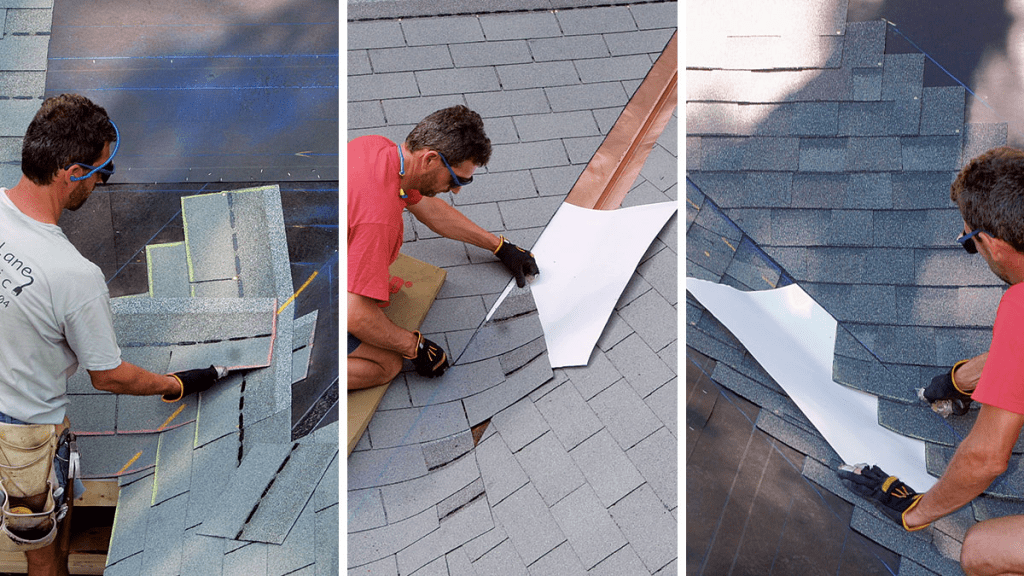
2.2. Position and Secure Shingles: Begin laying shingles from the bottom of the valley and work upwards. Align the shingles so that they overlap the valley flashing. Secure the shingles with roofing nails or staples, ensuring that the fasteners are placed correctly to avoid leaks.
2.3. Trim Excess Shingles: As you work your way up the valley, trim any excess shingles that extend beyond the valley flashing. This ensures a clean and neat finish.
2.4. Seal the Valley: Apply roofing cement or sealant along the edges of the valley flashing to prevent any potential leaks. Ensure that the sealant covers all nail heads and gaps.
3. Shingling Closed Valleys
3.1. Lay Down the Starter Course: Begin with a starter course of shingles in the valley. Ensure that the starter course extends into the valley area and overlaps the underlayment.
3.2. Install Subsequent Shingles: Lay the shingles in a shingle-over-shingle pattern, making sure each row overlaps the previous one. Maintain proper alignment and overlap to create a watertight seal.
3.3. Cut and Fit Shingles: Use a utility knife to cut shingles as needed to fit the valley area. Ensure that all cuts are clean and precise to avoid gaps.
3.4. Secure and Seal: Secure the shingles with roofing nails or staples. Apply roofing cement or sealant along the edges and seams to seal any potential leaks.
Tips for Successful Valley Shingling
To achieve the best results when shingling valleys, consider the following tips:
- Follow Manufacturer’s Guidelines: Always refer to the manufacturer’s instructions for both shingles and valley flashing. Adhering to these guidelines ensures compatibility and effectiveness.
- Ensure Proper Overlap: Adequate overlap of shingles and flashing is crucial to prevent leaks. Make sure that shingles extend well into the valley and overlap the underlayment and flashing.
- Use Quality Materials: Invest in high-quality roofing materials to ensure durability and performance. Quality shingles and flashing contribute to a long-lasting roofing system.
- Work in Dry Conditions: Avoid shingling during wet or adverse weather conditions. Dry conditions provide better adhesion and reduce the risk of complications.
- Check Local Building Codes: Ensure that your shingling methods comply with local building codes and regulations. This helps to meet safety standards and prevent potential issues.
Common Mistakes to Avoid
Avoid these common mistakes to ensure a successful shingling job:
- Insufficient Overlap: Failing to provide adequate overlap can lead to leaks and water damage. Ensure that shingles and flashing overlap properly.
- Improper Fastening: Incorrect placement of roofing nails or staples can result in leaks and shingles becoming dislodged. Follow manufacturer recommendations for fastener placement.
- Neglecting Sealant: Skipping the application of roofing cement or sealant can lead to leaks and reduce the effectiveness of the shingling. Apply sealant to all necessary areas.
- Ignoring Roof Inspection: Failing to inspect the roof before shingling can result in missed damage or issues that may compromise the roofing system. Conduct a thorough inspection before beginning work.
Conclusion
Shingling valleys on a roof is a crucial task that requires precision and attention to detail. By following the steps and tips outlined in this guide, you can achieve a professional and leak-proof finish for your roof valleys. Proper installation of shingles and flashing ensures that your roofing system performs effectively and provides long-lasting protection for your home.
Whether you’re a DIY enthusiast or a professional roofer, mastering the art of shingling valleys is essential for creating a durable and reliable roofing system. With the right techniques and materials, you can achieve a high-quality result that enhances the performance and appearance of your roof.
Leave a Reply