Installing a metal roof is a popular choice for many homeowners due to its durability, energy efficiency, and longevity. One crucial aspect of a successful metal roof installation is knowing where to put screws on a metal roof. Proper screw placement ensures the roof’s stability, prevents leaks, and extends its lifespan. This guide will walk you through the essential steps and best practices for correctly placing screws on a metal roof.
Understanding Metal Roof Screws
Metal roof screws are designed to secure metal roofing panels to the underlying structure. They typically come with a rubber washer that creates a watertight seal, preventing water from seeping through the screw holes. Using the right type of screws and placing them correctly is vital to the roof’s integrity.
Why Proper Screw Placement Matters
Incorrect screw placement can lead to several issues, including:
- Leaks: Improperly placed screws can cause water to penetrate the roof, leading to leaks and water damage.
- Panel Movement: Incorrect placement can result in panels shifting or lifting during high winds or severe weather.
- Reduced Lifespan: Poor screw placement can compromise the roof’s structural integrity, shortening its lifespan.
Tools and Materials Needed
Before starting the installation, gather the necessary tools and materials:
- Metal roofing panels
- Roofing screws with rubber washers
- Screw gun or drill
- Measuring tape
- Chalk line
- Ladder
- Safety gear (gloves, goggles, harness)
Read too: Decoding Timelines: How Long Does It Take To Replace A Roof and What to Expect
Where To Put Screws On Metal Roof: Step-by-Step Guide
Step 1: Plan Your Screw Placement
Proper planning is crucial for ensuring that screws are placed accurately. Follow these guidelines:
- Spacing: Screws should be placed every 12 to 18 inches along the panel’s length and every 24 to 30 inches across the panel’s width.
- Edge Placement: Place screws about 1 inch from the panel’s edge to ensure a secure hold without causing damage.
- Ridge and Eave: Ensure screws are placed along the panel’s ridges (high points) and eaves (low points) for maximum stability.
Step 2: Mark the Screw Lines
Using a measuring tape and chalk line, mark the screw lines on the roofing panels. This ensures consistent screw placement and alignment. Mark both vertical and horizontal lines according to the planned spacing.
Step 3: Pre-Drill Holes (Optional)
Pre-drilling holes can help ensure accurate screw placement and prevent the panels from shifting during installation. Use a drill bit slightly smaller than the screw diameter to create pilot holes along the marked lines.
Step 4: Install the Screws
Begin at the bottom edge of the roof and work your way up. Follow these steps for installing the screws:
- Align the Panel: Ensure the panel is properly aligned with the roof edge and the adjacent panel.
- Insert the Screw: Place the screw through the pre-drilled hole or directly onto the marked line.
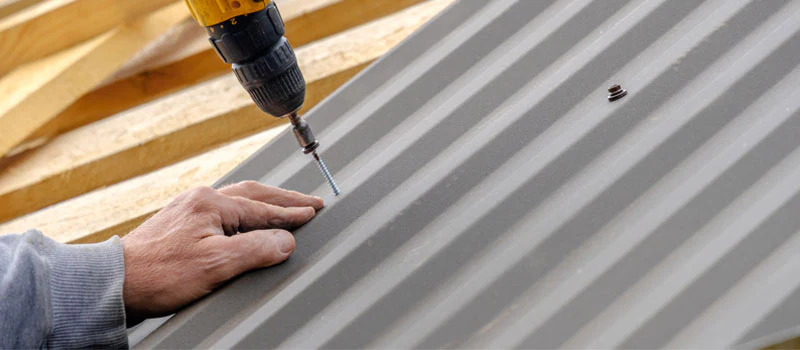
- Tighten the Screw: Use a screw gun or drill to tighten the screw until the rubber washer is compressed and creates a watertight seal. Be careful not to overtighten, as this can damage the panel or washer.
Step 5: Continue Across the Roof
Continue installing screws along the marked lines, ensuring each screw is properly tightened. Move across the roof panel by panel, maintaining consistent spacing and alignment.
Common Mistakes to Avoid
- Over-Tightening Screws: Over-tightening can damage the rubber washer and compromise the seal, leading to leaks.
- Under-Tightening Screws: Under-tightened screws can cause panels to shift or lift, reducing the roof’s stability.
- Inconsistent Spacing: Inconsistent screw placement can result in uneven panel alignment and compromised structural integrity.
- Improper Edge Placement: Placing screws too close to the panel’s edge can cause the metal to warp or crack.
Maintenance Tips for Metal Roof Screws
Regular maintenance can help extend the lifespan of your metal roof and ensure the screws remain effective:
- Inspect Annually: Check the roof and screws at least once a year for signs of damage or wear.
- Tighten Loose Screws: Over time, screws can loosen due to weather conditions and roof movement. Tighten any loose screws to maintain a secure hold.
- Replace Damaged Screws: Replace any screws that show signs of rust, damage, or wear to prevent leaks and maintain the roof’s integrity.
Conclusion
Knowing where to put screws on a metal roof is essential for a successful installation and long-lasting performance. By following the guidelines and steps outlined in this guide, you can ensure your metal roof is securely fastened, leak-free, and capable of withstanding various weather conditions. Proper screw placement not only enhances the roof’s durability but also contributes to its overall aesthetic appeal.
Taking the time to plan, mark, and carefully install each screw will pay off in the long run, providing you with a metal roof that stands the test of time. Regular maintenance and inspections will further ensure your roof remains in top condition, protecting your home and investment for years to come.


Leave a Reply