Roof felt is an essential component of a roofing system, providing a protective layer between the roofing deck and shingles. Proper installation of roof felt is crucial for ensuring the durability and effectiveness of your roofing system. This guide will walk you through the process of installing roof felt, offering tips and insights to help you achieve a successful and long-lasting installation.
What is Roof Felt?
Roof felt, also known as roofing felt or tar paper, is a material used in roofing applications to provide a layer of protection against moisture. It is typically made from fiberglass or organic matting, saturated with asphalt to create a water-resistant barrier. Roof felt is installed under shingles or other roofing materials to help prevent leaks and improve the overall integrity of the roof.
Benefits of Using Roof Felt
- Moisture Protection: Roof felt acts as a secondary barrier against water infiltration, helping to keep the underlying structure dry and protected.
- Improved Insulation: It provides an extra layer of insulation, contributing to better temperature regulation within the building.
- Enhanced Durability: Roof felt adds durability to the roofing system by reinforcing the surface and providing a buffer against physical damage.
- Ease of Installation: It is relatively easy to handle and install, making it a popular choice for both professional roofers and DIY enthusiasts.
How to Install Roof Felt: Step-by-Step Instructions
1. Gather Your Materials and Tools
Before you begin, ensure you have all the necessary materials and tools:
- Roof felt rolls (standard or synthetic)
- Roofing nails or staples
- Hammer or staple gun
- Utility knife
- Measuring tape
- Chalk line
- Ladder
- Safety gear (gloves, goggles, harness)
Read too: How To Replace Roof Shingles That Blew Off: A Comprehensive Guide
2. Prepare the Roof Surface
- Remove Old Roofing Materials: If you are replacing existing roof felt or re-roofing, remove the old roofing materials, including old felt, shingles, or other coverings.
- Inspect and Repair: Check the roof deck for any damage or rot. Repair any issues before installing the new roof felt to ensure a smooth and stable surface.
- Clean the Surface: Sweep away debris, dust, and loose materials from the roof deck. A clean surface ensures better adhesion of the roof felt.
3. Measure and Cut the Roof Felt
- Measure the Roof: Determine the length and width of the roof area where the felt will be installed. Roof felt rolls typically come in 36-inch-wide rolls, so measure the length of each section needed.
- Cut the Felt: Using a utility knife, cut the roof felt into manageable sections. It’s easier to work with smaller pieces rather than attempting to handle a full roll on the roof.
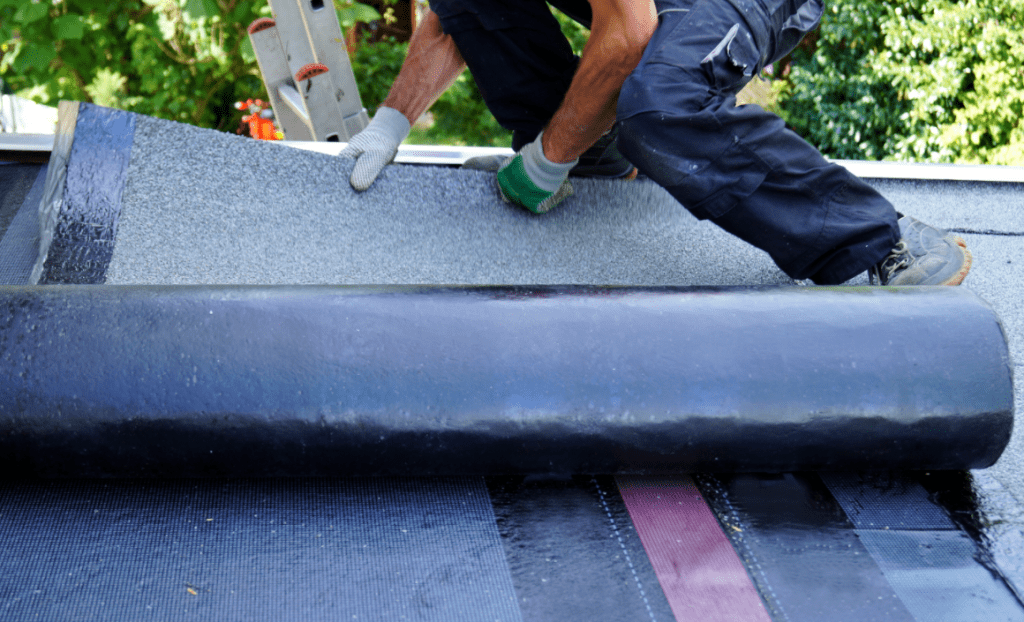
4. Install the First Row of Roof Felt
- Position the Felt: Starting at the bottom edge of the roof, unroll the first section of roof felt. Align the bottom edge with the eaves and make sure the felt is centered.
- Secure the Felt: Use roofing nails or staples to secure the felt along the top edge and sides. Space the fasteners about 6 to 8 inches apart to ensure the felt stays in place.
- Overlap the Edges: For proper water protection, overlap the edges of the felt by at least 2 inches. This prevents water from seeping between the layers.
5. Continue with Additional Rows
- Unroll the Next Section: Continue installing roof felt by unrolling the next section above the first. Ensure that the felt overlaps the previous row by at least 2 inches.
- Secure and Overlap: Repeat the process of securing the felt with nails or staples and maintaining proper overlap. Work your way up the roof, making sure each row is properly aligned and secured.
6. Install Felt Around Roof Penetrations
- Cut and Fit: For areas around roof penetrations such as chimneys, vents, or skylights, cut the felt to fit around these features. Make sure to overlap the felt around these areas and secure it tightly.
- Seal Edges: Apply roofing sealant or caulk around the edges of the felt where it meets roof penetrations to prevent water infiltration.
7. Finish the Installation
- Inspect the Installation: Once all the felt is installed, inspect the roof to ensure there are no gaps, wrinkles, or unsecured areas.
- Trim Excess Felt: Trim any excess felt along the edges of the roof to create a clean finish.
- Prepare for Shingles: If you are installing shingles or other roofing materials, make sure the roof felt is properly in place and smooth before proceeding with the next steps.
Tips for a Successful Roof Felt Installation
- Work in Dry Conditions: Install roof felt on a dry day to ensure proper adhesion and to avoid complications with moisture.
- Use Proper Safety Gear: Always wear appropriate safety gear, including a harness and non-slip footwear, when working on the roof.
- Ensure Proper Ventilation: If working in hot conditions, ensure proper ventilation to avoid overheating and discomfort.
- Check for Code Compliance: Familiarize yourself with local building codes and regulations to ensure your installation meets all requirements.
Common Mistakes to Avoid
- Inadequate Overlap: Failing to overlap the felt properly can lead to water infiltration. Always ensure a minimum of 2 inches overlap between rows.
- Skipping Repairs: Installing roof felt over damaged or rotting decking can lead to long-term issues. Always inspect and repair the roof deck before installation.
- Improper Fastening: Using too few nails or staples can result in the felt shifting or coming loose. Follow the recommended fastening guidelines for secure installation.
Conclusion
Installing roof felt is a crucial step in creating a durable and effective roofing system. By following the steps outlined in this guide and paying attention to detail, you can ensure a successful installation that provides long-lasting protection for your home. Whether you are a DIY enthusiast or a professional roofer, understanding how to install roof felt properly will contribute to the overall quality and reliability of your roofing project.


Leave a Reply