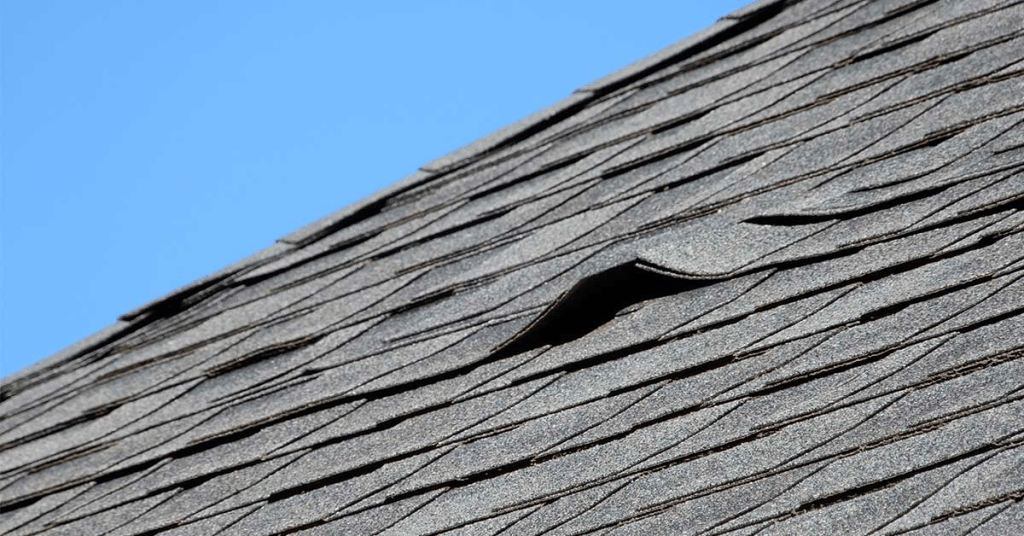
Wind damage to roof shingles can be a serious concern for homeowners, especially in regions prone to storms. Understanding how wind affects your roof can help you take preventative measures and address any damage quickly. This comprehensive guide covers the causes, signs, and solutions related to wind damage roof shingles.

What Causes Wind Damage to Roof Shingles?
Wind damage can occur when high winds lift or dislodge shingles, exposing the underlying layers of your roof. Several factors contribute to this type of damage:
- Wind Speed: Wind speeds above 60 mph can begin to affect roof shingles, especially if they are already loose or aging.
- Shingle Quality: The type and quality of shingles installed play a significant role. Asphalt shingles, while common, may be more susceptible to wind damage compared to metal or tile roofs.
- Installation: Proper installation is crucial. Poorly installed shingles may not withstand high winds and are more likely to be damaged.
- Roof Pitch: The slope of your roof can influence how wind interacts with your shingles. Steeper roofs may shed wind more effectively, while flatter roofs may trap wind.
- Age of the Roof: Older roofs are more prone to damage. Over time, shingles can become brittle and lose their protective granules.
Read too: How To Replace Roof Shingles That Blew Off: A Comprehensive Guide
Signs of Wind Damage to Roof Shingles
Identifying wind damage early can save you from costly repairs. Here are some common signs to look for:
1. Missing or Lifted Shingles
One of the most obvious signs of wind damage is missing shingles or those that are lifted at the edges. If you notice these, it’s essential to inspect further.
2. Curling or Cracked Shingles
Wind can cause shingles to curl or crack. If you see these issues, it indicates that your roof may be compromised.
3. Granule Loss
Examine your gutters for granules that have washed off your shingles. This is a sign that your shingles are deteriorating and may not be effectively protecting your roof.
4. Leaks Inside Your Home
If you notice water stains or leaks in your ceiling or walls, it may indicate that your roof shingles have been compromised.
5. Increased Energy Bills
Damaged shingles can lead to decreased insulation, causing your HVAC system to work harder, which can result in higher energy bills.
Preventing Wind Damage to Roof Shingles
While it’s impossible to prevent all wind damage, you can take several proactive steps to minimize the risk:
1. Choose High-Quality Shingles
Invest in high-quality, wind-resistant shingles that meet or exceed local building codes. These shingles are specifically designed to withstand high winds.
2. Ensure Proper Installation
Hiring a qualified contractor for installation is crucial. Ensure that your roofing contractor follows manufacturer guidelines and local building codes.
3. Regular Inspections and Maintenance
Conduct regular roof inspections, especially after severe weather events. Look for signs of damage and address them promptly.
4. Trim Overhanging Branches
Branches that overhang your roof can cause additional damage during high winds. Regularly trim trees to prevent branches from falling onto your roof.
5. Reinforce Roof Structure
Consider reinforcing your roof structure, especially if you live in a high-wind area. This can include installing additional supports or using hurricane straps.
Repairing Wind Damage to Roof Shingles
If you discover wind damage to your shingles, addressing the issue quickly is essential to prevent further damage. Here’s a step-by-step guide on how to repair wind damage to roof shingles:
Step 1: Assess the Damage
Before making repairs, assess the extent of the damage. Take note of missing, lifted, or cracked shingles, as well as any underlying issues.
Step 2: Gather Necessary Tools and Materials
You will need:
- Replacement shingles
- Roofing nails
- Hammer
- Utility knife
- Roofing cement
Step 3: Replace Missing or Damaged Shingles
- Remove Damaged Shingles: Use a utility knife to cut away the damaged shingles carefully. Remove nails and clean the area.
- Install New Shingles: Slide the new shingle into place, ensuring it aligns with the surrounding shingles. Secure it with roofing nails.
- Seal Edges: Apply roofing cement to the edges of the new shingle to ensure a watertight seal.
Step 4: Inspect Flashing and Vents
Check flashing around chimneys and vents for damage. Seal any gaps or cracks with roofing cement or replace damaged flashing.
Step 5: Conduct a Final Inspection
Once repairs are complete, conduct a final inspection to ensure everything is secure and watertight.
When to Call a Professional
While minor repairs can be handled by homeowners, more extensive damage should be assessed by a roofing professional. If you notice widespread damage, multiple missing shingles, or signs of leaks, it’s best to consult a contractor. They can provide a thorough inspection and recommend the best course of action.
Conclusion
Understanding wind damage to roof shingles is essential for every homeowner. By recognizing the signs of damage, taking preventive measures, and knowing how to address repairs, you can protect your investment and ensure your roof remains functional and attractive for years to come. Regular maintenance and professional inspections will go a long way in preserving your roof’s integrity against wind damage.


Leave a Reply